50 Cute Valentine’s Day Nail Ideas We Can’t Help But Love


Maya Ernest
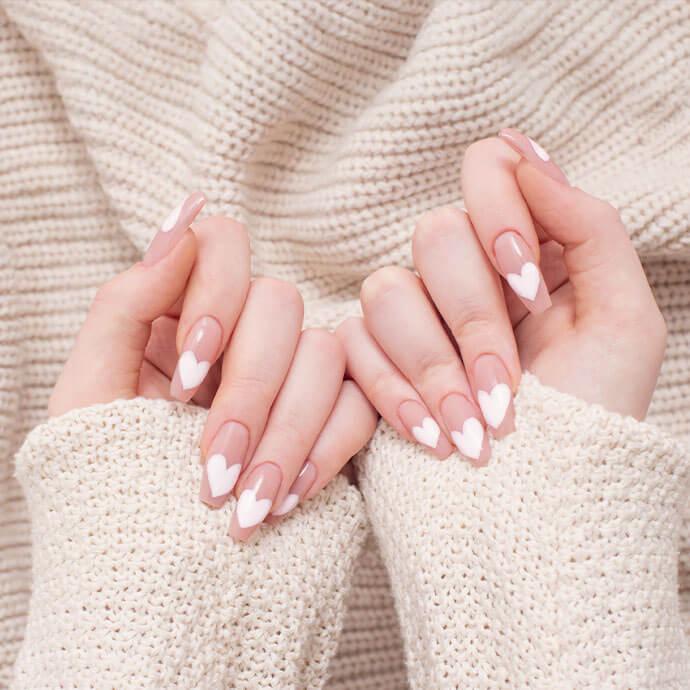
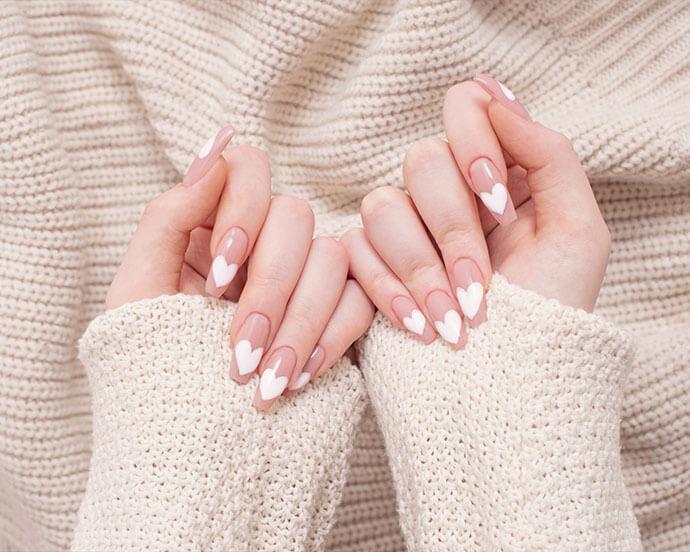
Photo by Maya23K/Getty Images
Valentine’s Day is just around the corner, and there’s no better way to practice self-love than with a manicure that’s perfectly on theme. This is the time to embrace your inner romantic, whether that looks like strawberry-milk pink nails, red cat-eye French tips, or sparkly nail stickers.
And while Valentine’s Day nails may bring candy hearts and kiss motifs to mind, we promise there are some non-cheesy nail designs out there. In fact, we’ve rounded them all up for you, and even found some you might want to wear past February 14. No matter if you’re planning a romantic date night, a champagne toast with friends, or a solo marathon of Love Island, these Valentine’s Day nail ideas will fit any vibe. Keep scrolling for the 50 best Valentine’s Day nails of 2026.
It's about glam time you treated yourself.
Join IPSY

Valentine’s Day Nails You’ll Want to Screenshot ASAP
1. Pink and Red Polka Dots
Skip the hearts and let the colors do the talking with these polka-dot nails. They’re super easy to recreate at home—all you’ll need is a red polish, a pink polish, and a dotting tool. After painting each of your hands either pink or red, use the dotting tool and the contrasting color to create your polka-dots, spacing them out as you see fit. Finish off with a clear top coat to seal in the magic.
2. Studded Burgundy Nails
For a trendier spin on Valentine’s Day nails, try out these studded burgundy nails. Of course, you can switch out the base color for anything—we’d love to see this look with a classic red or hot pink. Whatever your choice, outline each nail with silver studs. You can either use silver appliqués, or you can use builder gel to create small dots, then coat each stud with silver chrome powder.
3. Checkered Outline Nails
Subtly incorporate your loved one’s initials into your manicure with these checkered outline nails. After applying a neutral base color, use a dotting tool to create a heart in the middle of each nail. Then, use a small nail brush to outline each nail with white polish. Switch back to your dotting tool and dip it into a black polish to add the “checkers” to the frame. And, whether it be your boyfriend, girlfriend, or best friend, add their initial to the corner of each ring-finger nail. Now that’s wearing your heart on your sleeve.
4. Aura Heart Nails
Aura nails have been a trend for a few years now, and while we’re loving every variation of the look, we’re head over heels for this Valentine’s Day version. To get the look, take your lighter shade and paint it around the edges of your nails as a base. If you’ve got professional tools, reach for an airbrushing pen (or a classic makeup sponge will work all the same too). Either airbrush your next color on, or if you’re DIYing, apply your darker polish color to your sponge. Lightly dab your coated sponge onto the middle of your nail, keeping the color toward the center of your nail. With a metallic shade (or nail stickers!), use a dotting tool to create your heart.
5. Colorblock Heart Nails
It doesn’t get more classic than these colorblocked heart nails. You can recreate them at home hassle-free with a scarlet red polish, a baby pink polish, and a dotting tool. Start by painting your nails with your base color, then use a dotting tool to shape—or freehand—your heart in the middle of your nail. Seal with a top coat, kick back, and fall in love with your new mani.
6. Fiery Chrome Heart Nails
There’s no better way to express the fire in your heart than with these Cupid-approved chrome nails. After painting on a neutral base color or a clear base coat, take a builder gel and trace out the shape of a flaming heart. Once you’ve got the raised heart outline, use a sponge pen to rub on some pink chrome powder, and seal with a clear top coat. We find adding an extra coat of top coat ensures the chrome powder won’t budge—and neither will any of your Valentines.
7. Polka-Dot Jelly Nails
We’ve been obsessed with jelly nails lately, and this Valentine’s Day edition is everything we wanted and more. Before painting on your jelly layer though, coat your nails in a white polish and use a dark red polish to create your polka-dots and hearts. Then, go in with your jelly layer and a top coat. If you don’t have a jelly polish on hand, you can also create your own—just check out our tutorial.
8. Cat-Eye French Tips
French is widely regarded as the language of love, so it makes sense French manicures are equally as romantic—at least, this set is. Just like you would with any other French mani, start with a neutral base. Then, take a cat-eye polish of your choice and swipe it over the top of your nail. Don’t focus on perfecting your tip, since you can always clean it up using our favorite secret weapon: a Q-tip dipped in nail polish. Once you’ve activated the cat-eye effect with a magnetic wand, use a small nail brush and a red nail polish to create little hearts wherever your, well, heart desires.
9. Candy-Coded Nails
Indulge your sweet tooth with these colorful candy-coded nails. Since this mani involves so many colors, we recommend heading to your local salon—that is, unless you’ve got your own salon at home. If you’re DIYing, nail the airbrushed look by painting stripes onto a makeup sponge using your preferred nail polish shades. Lightly dab the sponge over each nail a few times to create that slightly blurred effect. Soon enough, you’ll have a mani that’s over the rainbow.
10. Burgundy Star Nails
Take a break from the usual Valentine’s Day hearts and trade them in for some charming stars. After painting on a neutral base, use a dotting tool or small nail brush to create a star in the middle of each nail. We love the burgundy color of this nail art, especially when paired with a matching lippie. Try the NEEN Glisten Up Lip Gloss in Boss to guarantee you’re the star of the show.
11. Chrome Flame Nails
Ignite your passion (or theirs) with this fiery metallic manicure. Start off with a chrome base, and seal it off with a clear top coat to make sure that chrome powder doesn’t move. Then, use a detailing brush to paint on your red flames. Don’t stress too much about perfecting the shape, since no flame is the same—just like you, they’re one of a kind.
12. Chrome Cat-Eye Heart Nails
If you’re craving a mani that’s got it all, try this one. Enhanced by a metallic cat-eye polish, chrome gold details, and heart-shaped nail art, these nails are the complete package. That said, the easiest way to get this mani is to bring this photo to the salon for inspo. Add your own twist to your glam with a complementary sparkly gold eyeshadow, like this ICONIC LONDON Glaze Crayon Dual-Ended Glitter Eyeshadow in Goldmine.
13. Lucky Love Nails
Love may be a gamble, but you’re sure to win hearts with this lucky manicure. With a few detail brushes, a handful of polishes, and a lot of patience, you’re sure to ace this look. Trust, all the details—and all the compliments you’ll get—are worth it.
14. Airbrushed Valentine Nails
Can’t choose a nail design? Try combining them all with this holiday-themed manicure. The pearl appliqués and airbrushed details are our favorite, and you can customize the look by choosing the initial you want to rep—whether that be your significant other’s, your bestie’s, or your own. Let your heart (and your nail tech) guide the way.
15. Clown Heart Nails
These nails are no joke, but they definitely have a sense of humor. For this look, you’ll need to use builder gel to create the 3D effects (like the clown’s cheeks and the heart balloon). And when it comes to details, more is definitely more here. Don’t be afraid to customize the sparkle nail art and French tip colors.
16. Candy Heart Nails
Candy hearts are a Valentine’s Day classic, and they also make really cute nail art. This mani is easy enough to recreate at home, and we love that you can customize the saying on each heart. “Be Mine” and “Cutie” are timeless, but we’d love to see “I Love You More Than Pizza.” Of course, that might be hard to fit on just one nail…
17. Retro Heart Nails
Maybe you’re tired of the pink and red palette, or maybe it’s just not your thing. Whatever the reason, you can still embrace the spirit of Valentine’s Day with these retro heart nails. The polish colors, and the order you put them in, are entirely up to you. To make your look a touch more romantic, pair your nails with gorgeous Valentine’s Day glam. This RACHEL COUTURE Woodstock Eyeshadow Palette has all the colors you’d need to match your mani.
18. Dotted Pink and Red Nails
Simple and sweet, this manicure only takes a few steps. First, grab a light pink polish and a maroon one, and paint the nails on each hand accordingly. You can even switch the pattern up and paint every other nail, or create a few accent nails. Once you’re happy with your base colors, grab the contrasting color and get to dotting. You can use a toothpick or a dotting tool to add the polka dots to the outline of your nails.
19. Cherry Heart Nails
How cute are these delicate little cherries? You can totally recreate this Valentine’s Day mani at home in just a few steps. All you need are a few nail polish colors, a detailer nail brush, and maybe a TV show or good playlist to play in the background while you nail art away. Don’t forget to seal in your look with a clear top coat, and prep your nails by properly filing and shaping them.
20. Checkered Cupid Nails
When Lady Gaga sang about a “LoveGame,” we didn’t realize she was talking about checkers. The red and pink palette of this mani makes it perfect for Valentine’s Day, but we promise you’ll want to wear this set beyond the holiday. Pro tip: When creating your checkers, outline the squares first before filling them in. That way, it’ll be easier to correct any mistakes.
21. Mismatch Pattern Nails
Can’t decide what pattern to go with? Choose all of them! For this mani, you’ll definitely want a dotting tool and detailing brush, since those will help you create the polka dots, stripes, and checkers with ease. Still, don’t rush into painting these shapes—when the details are your whole look, you’ll want to take extra care. Check out our nail art tips for guidance.
22. Ombré Heart Nails
These ombré nails are so chic—and there’s no gradient blending required. Instead, you’ll want to play around with nail polish colors until you find a pink rainbow you’re happy with. Take the lightest color and use that on your pinky (or thumb) and work your way forward through the colors. Then, line up your polish colors again, and use the shade from your previous finger to create the heart on your current finger. (For the lightest shade, you can use a white polish.) The final result? A mani you’ll absolutely “heart.”
23. 3D Heart Lollipop Nails
If candy hearts aren’t your thing, go with these three-dimensional heart lollipops. We recommend heading to your nearest salon for these, since they’ll require a lot of builder gel. Even if you are a builder gel pro, it might be easier to let someone else sculpt these sweet treats—especially since you’ll have to create them on both hands. That said, you can always add these lollipops to one accent nail, or every other nail, to speed up the process.
24. Pop Art Valentine Nails
These whimsical nails will delight any cartoon lover (or Andy Warhol pop art enthusiast). Here, you’ll be relying on a detailing brush and a dotting tool for your nail art. Start by painting your red accent nail, French tips, and heart nail art first. From there, you can use a black polish to create shadows and a white one to create highlights. We love the matte finish on this manicure.
25. Heart Eye Nails
Want to give a subtle nod to your “heart eyes”? Try this Comme des Garçons-inspired manicure. Pick out your base color, like this vibrant red, and paint all of your nails that shade. Then, grab a light pink polish and use a detailing brush to create your tiny heart. You can also use a dotting tool to make the romantic shape—just place two dots close together and drag the polish down to connect them. And for the eyes, use whatever tool you feel most comfortable with. A dotting tool might be great for the whites of the eyes, while a nail brush might be easier for the teeny-tiny pupils.
26. Valentine Roulette Nails
If you’ve graduated from simple nail designs, let this be your sign to go big. This mani really has it all, from stripe and star nail art to colorblocked French tips and ombré details. Can you believe this only takes three polish colors? Plus, you can make the look your own by switching up what order you want your accent nails in, or what nail art you do in the first place. Call it Valentine’s Day roulette.
27. Classic Stripe Nails
Striped nails are a tried-and-true nail art pattern, and it’s easy to see why. Not only does this mani look super cute, but it’s easy to paint—even if you’ve never tried nail art before. Simply paint your nails pink and then use a nail brush to add your stripes in a different color. You can freehand these, or use tape to make sure each line is super straight. No biggie if they’re not, since you can always make each stripe bigger or clean up the edges with a brush dipped in nail polish remover.
28. 3D Maraschino Red Nails
Three-dimensional nail art is having a moment (if you haven’t noticed by this list alone). We can’t help it—the raised builder gel details really make a manicure pop. And what better way to hop on the trend than with these deep-red abstract nails? They’ve got a bit of a jelly texture too, making those Maraschino cherry details look extra juicy. Match the look with a lippie that’s just as delicious, like this hydrating and plumping MAKEUP BY MARIO MoistureGlow™ Plumping Lip Color in Hot Pink.
29. Valentine’s Aura Nails
It’s that time of year where our aura is pink and red. We love this subtle tribute to Valentine’s Day, especially since you can wear it long after the love-filled holiday. Use a dark red as your base, apply a little pink polish to a makeup sponge, and lightly dab the sponge in the middle of your nail to create that airbrushed aura effect. You can even invert the hues and put the darker color on top.
30. Pink Rhinestone Nails
These blinged-out French tips are so fab and can really be worn any time of the year. After painting on your pink Frenchies, top the look off with a clear polish and let it dry down. Then, grab some rhinestones—try using a bunch of colors, as shown here, or go with one statement shade, like a dark red—and use nail glue to attach each appliqué. Add a thin layer of top coat to make sure those rhinestones will last until your next manicure.
31. Sherbert Sparkle Nails
The pink and orange shades of this manicure remind us of a romantic sunset (or a tub of sherbert split with friends). Just like you would with aura nails, you’ll use a makeup sponge to apply your polishes—a method that will leave you with nice diffused colors and no harsh lines. Of course, the piece de resistancé of this mani is the cartoonish white sparkle details, which will have everyone doing a double take.
32. Pink Chrome Nails
Not all Valentine’s Day manicures have to be sweet and subtle. Add a bit of edge to your look with these three-dimensional chrome details, which are practically jewelry for your nails. We love the jelly polish base here, since the translucent pink color really lets those silver swirls and stripes shine. Pair this mani with a glossy lippie, like the FENTY BEAUTY Slip Shine Sheer Shiny Lipstick in Retro Rose.
33. Candy-Striped Nails
Treat yourself with this candy-striped mani. We’re obsessed with the light pink and burgundy color combo here, especially since it fits into the holiday theme but isn’t glaringly obvious. Create a light pink French tip–the length and shape is totally up to you—then go in with a detailing brush and start painting your stripes. Try outlining your stripes before filling them in so you can make sure they’re parallel and even.
34. Chrome Pink Nails
These pink chrome nails are so cool, your friends will want to rock a matching mani. Not only can you all head to the nail salon together and have a self-care day, but each of you can choose variations on the manicure to make it unique to your personality. One thing you def don’t want to forget, however, are those reflective pink sequins.
35. Two-Toned Heart Nails
You wouldn’t usually associate black and white with the day of ~love~, but this set reminds us of an iconic scene in Alice in Wonderland (IYKYK). The two-toned design really makes the heart design stand out, and you don’t have to go with just one shade. If you’re planning to DIY this look at home, know it will take a lot of patience, but we promise this mani is worth your dedication.
36. Heart French Tips
You can’t go wrong with this lovey-dovey French manicure. Start by drawing on your French tips, alternating pink and red nail polish shades on each finger. Once those have dried down, take a nail brush and paint on your hearts, using the opposite polish color as your French tip. Take a moment to admire your work, then use a clear top coat to lock in the look.
37. Jellycat Valentine Nails
Jellycat stuffies have been in the spotlight for a few years now, but it’s only now that we’ve realized they make really cute nail art. Since this handpainted mani is full of tiny details, it might be best to let a dedicated nail artist replicate the look. That way, your only worry will be which Jellycat to get your Valentine. Just look to your mani for inspo!
38. Valentine Stamp Nails
What’s a Valentine’s Day love letter without a stamp to send it off? Paint a tribute to the romantic tradition with this detailed manicure. Here, remember to work your way up through the nail art order: You’ll want to paint your neutral base first, your white stamp base second, your stamp color third, and your stamp details last. We wouldn’t mind getting a postcard of this nail art masterpiece.
39. Blue Valentine Nails
Don’t be blue on Valentine’s Day—unless you’re rocking this mani, that is. Take a break from the traditional red and pinks of the holiday and trade them out for something a little more cool-toned. We love the negative space details here, especially because you can create them without a ton of back-breaking details. Simply apply a small heart silhouette made of tape (or a heart-shaped nail sticker) to your nail and paint over it. Let it dry, then peel the tape off to reveal your shape. You can always clean up the edges with a bit of nail polish remover.
40. Valentine Confetti Nails
If you’re planning a Valentine’s Day party, there’s no better way to celebrate than with this colorful confetti manicure. We recommend using a lighter-toned base shade, since that will help your nail art really pop. Dot your preferred confetti colors over your base, or shake things up with a touch of glitter polish and gold chrome. Make the look as detailed or demure as you like—you can always amp up the look with a matching glitter eyeshadow. We love the LAURA MERCIER RoseGlow Caviar Stick Eye Shadow in Forbidden Rose.
41. Rebel Heart Valentine’s Day Nails
One word: iconic. Celebrity manicurist Queenie Nguyen labeled her moody creation “rebellious hearts,” and nothing could describe the look (and vibes) better. We love the mix of gloss and matte polish with these whimsical black heart accent nails that speak to our dark side. After all, who said Valentine’s Day had to be all about pink nails and Cupid?
42. Negative-Space Valentine’s Day Nails
It’s no secret that the negative-space nail trend showed up for itself this year, and we don’t see it disappearing anytime soon. A racy red polish will create the perfect contrast against glossy blank cuticles as you wrap your fingers around a chilled glass of bubbly.
43. Red Cheetah Print Nails for V-Day
While cheetah print nails are always sexy, they can be tricky to DIY and time-consuming in the salon chair. A quick fix for a last-minute date night? These red cheetah-print press-ons that are basically lingerie for your nails.
44. Valentine’s Day Waves
Who doesn’t love a wavy, retro mani? The truth is, you can create this nail art no matter what time of year. Of course, the pink and red are what make it Valentine’s Day approved.
To create it, choose two shades of red and two pinks. Like the inspiration photo, you’ll notice one of the pinks is a bright pink and one is a bit more sheer or baby pink. The idea is to choose colors that will complement each other and create dimension. Grab that striping brush, you’ll need it to create the waves.
45. Yellow Heart Valentine’s Day Nails
If pink isn’t quite your thing but you still want to have a festive manicure, why not pick another color for dainty hearts?
This look is so simple, choose your sheer or nude base coat and grab a striping brush for the tiny hearts. We love the use of yellow as it feels like spring is right around the corner but might we suggest a sky blue as well. We think it would be super cute!
46. Water Drop Heart Valentine’s Day Nails
Another barely there manicure that looks so sweet and chic. 3D gel has become more and more popular with the rise of indie nail trends. Designing a clear gel heart or choosing a light pink would make the perfect jelly manicure. You’ll need to show a picture of this to your manicurist. They’ll know what to do and can create the free-form shape.
47. Velvet Rhinestone Valentine’s Day Tips
We say it all the time, but every single manicure we come across that features baby pink or blue and rhinestones makes us think of Cassie from Euphoria. These nails also remind us of early 2000s accessories when everything was seemingly pink with bling. This specific look uses a cat eye gel. Ask for cat eye gel or ‘velvet nail polish’ at your salon. It’s best to show them this photo. .
48. Glitter Candy Hearts
Does anyone actually eat conversation hearts? Whatever the case, we can certainly all agree that they’re super cute and a Valentine’s Day staple. Try these conversation hearts inspired nails—you could even write a message in a big heart on your thumb nail.
49. Howdy Honey
Calling all rodeo queens! These western-inspired nails are so cute we honestly can’t pick a fave. But, if we had to…How cute is the cowgirl boot vase?! Side note: how perfect would these be for a wild west-themed bachelorette?
50. Berry Babe
With soft pinks and playful strawberry accents, these nails are the perfect blend of sweet and subtle—ideal for adding a little extra charm to your look. We’re also obsessed with the idea of adding the initial of your S.O. or crush into the mix.
Final Thoughts
There are so many adorable Valentine’s Day nail designs, it’s hard to pick our favorite. Chrome pink nails, wavy nail art, and delicate French tips all sound like manicure dream dates. Whatever you end up going with, pair your nails with Valentine’s Day glam to create a look you can’t help but fall for. Head over to the IPSY Shop to check out the top beauty products we absolutely adore.
Liked this post? Share!
Related Stories

Nails
The Easiest Way to Moisturize Your Nails All Year Long
Published on Feb 3, 2026 • 3 min read

Nails
Strawberry Milk Isn’t Just a Tasty Treat—Here’s How to Ace the Nail Trend!
Published on Apr 23, 2025 • 6 min read


Nails
10 Cute and Colorful Korean Jelly Nail Designs to Try This Summer
Published on Feb 2, 2026 • 5 min read

Nails
The Ultimate Aura Nail Guide: DIY Tips & 10 Dreamy Designs to Try
Published on Feb 2, 2026 • 5 min read

Nails
TikTok’s Duck Nails Is the Most Interesting New Mani Trend
Published on Sep 3, 2021


Nails
9 Very Demure, Very Cutesy Nails to Try This Fall
Published on Sep 24, 2024


Nails
These Nail Trends Are About to Be Your Whole Personality
Published on Feb 2, 2026 • 6 min read

Nails
What Are Glass Nails? Everything to Know About the Shiny New Nail Trend
Published on Nov 27, 2024 • 5 min read
Beauty Picked Just for You
Get 5 products worth up to $70
Plus exclusive access to epic deals up to 80% off
Starting at just $14/month. Cancel anytime.