How to Get the Wavy Wet-Hair Look of Your Underwater Dreams


Maya Ernest

As summer approaches, we’re ready to set sail on the season’s biggest beauty trends. According to the Pinterest Predicts 2025 Trend Report, under-the sea-aesthetics are set to take over, putting sultry siren makeup and sea-inspired manicures at the top of our moodboards. Beachy waves are getting their own mermaid makeover, too, with the search term “wavy wet-hair look” up by 80%.
Sophisticated with a sultry edge, the wet-hair look has been around—just look at stylish celebrities like Zendaya and Bella Hadid who rocked the hairstyle ahead of the trend. But this time around, we’re pulling inspiration from the depths of the ocean to get a more mysterious, alluring look. (Believe it or not, however, this hairstyle requires more than just a shower.) For the full breakdown, we turned to celebrity hairstylist Milosz Pawlak, who showed us the foolproof way to get the wavy wet-hair look at home—no beach vacation required. Read on to see how to recreate the wavy wet-hair look yourself.


It's about glam time you treated yourself.
MEET THE EXPERT
About the Expert: Milosz Pawlak is a celebrity hairstylist based in London.
Behind the Trend
Seductive with a playful edge, the wavy wet-hair look is all about embracing your inner siren—but instead of luring in sailors, you’ll be luring in compliments. There’s something mysterious and alluring about the look, especially since you’ll have people wondering if you just got out of the shower or went for a swim.
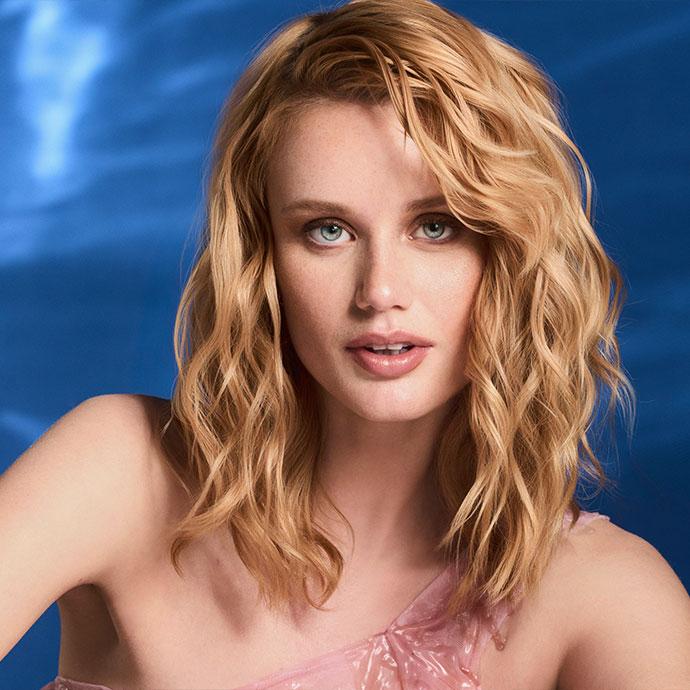
Despite its editorial look, the wavy wet-hair trend is fairly easy to achieve, and you don’t necessarily need any hot tools to get the look. Think of how your mermaid self would want to style her hair: Is it slicked back or falling down in wet waves? The best part is how customizable it is—you can go full siren with a shellacked, high-shine finish, or keep it more low-key with soft, tousled waves that have just a hint of that wet-look sheen (like below!).

How to Get the Wavy Wet-Hair Look
1. Gather Your Tools
The wet-hair look is relatively simple to achieve, but you’ll need more than a fork to ace the trend (sorry Ariel!). Pawlak recommends laying out your tools ahead of time, so before you start, you’ll want to gather your preferred hair gel, a styling cream, a wide-tooth comb, a fine-tooth comb, hair clips, and a microfiber towel. Those with coarse or curly hair might also want to have a diffuser on-hand to help dry down your final look. When doing hair, Pawlak also likes to keep a spray bottle full of water nearby—that way you can always re-wet your hair and tweak your styling.
2. Start With Damp Hair
While you want your hair to be damp, you don’t want it to be soaking wet—otherwise, warns Pawlak, your products won’t stick. “After washing your hair, use a microfiber towel to dry it down,” he says (we love the KITSCH Microfiber Hair Towel). “This will leave your hair slightly wet but not to the point where your product slips out.” You can always spritz your hair with a bit of water if it dries too quickly while you’re styling.
3. Apply Your Product
Next, you’ll want to work in your product. “Mix equal parts gel and cream in your hand,” says Pawlak. Just using a gel will leave your hair crunchy, while a cream doesn’t have enough hold on its own to keep your look in place. Using them together will give you the perfect blend of product—and as Pawlak reminds us, you can always add more later.
Your hair type, texture, and length will determine how much product you need. If you have curly hair, consider prepping your hair with a deep condition first, since you’ll want your hair to be extra moisturized. For fine and short hair, apply your gel and cream mixture from roots through tips, while those with longer or coarser hair should only apply product from roots through mid-lengths. “Avoid adding too much product, since that will lead to clumps and flakes,” says Pawlak. “The wet hair look is all about sleek styling, so your hair should be coated with product but not stuck together as a result.” If you feel you’ve accidentally added too much product, you can always spray your hair with a bit of water to comb out the extra.
4. Style Your Hair
Once your hair is covered in product, start styling it in sections. “A fine-tooth comb is best for the slicked-back look, while a wide-tooth comb will give you that beachy, relaxed vibe,” says Pawlak. Your look will set as your product dries down, so it’s best to decide what aesthetic you’re going for beforehand.
For a sleek wet hair look, simply comb your hair back into your desired style. As your product dries, you can flatten down your stands with hair clips, adjusting where you want your hair to eventually lay. Meanwhile, a wavy hair look will see you clip your sectioned hair into waves. Space them out by an inch or two depending on how tight you want your waves. “Use your fingers, or the end of a sectioning comb, to define waves,” says Pawlak. “Then pin them into place using flat hair clips or barrettes.”
Those with curly or coarse hair will want to use a diffuser to dry down their hair. Hold the diffuser up to your hair and slowly move from section to section—too much movement can cause frizz, says Pawlak. Sectioning hair will help you focus on one area at a time, and help set defined waves beneath each of the clips.
5. Add Your Finishing Touches
You have a few options to finish your look. For an editorial vibe, keep your hair pushed back, like it would be had you just gotten out of the water. If you’re looking for a more lived-in feel, however, you’ll want to tousle the ends of your hair to loosen it up and break up any product cast. This will give your look a more laid-back, bohemian vibe—like a tropical siren opposed to one from the deep seas.
For more inspiration, take a peek at our favorite wavy wet-hair looks below.
Our Favorite Wavy Wet-Hair Looks
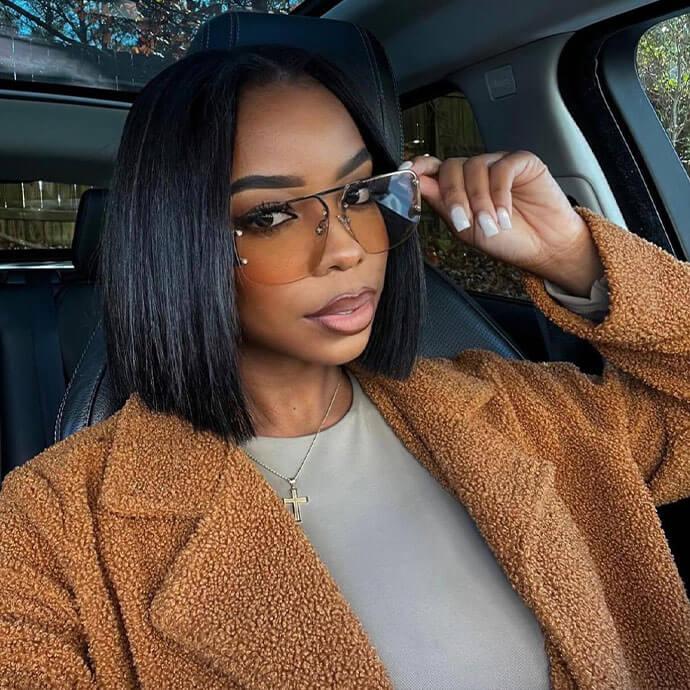
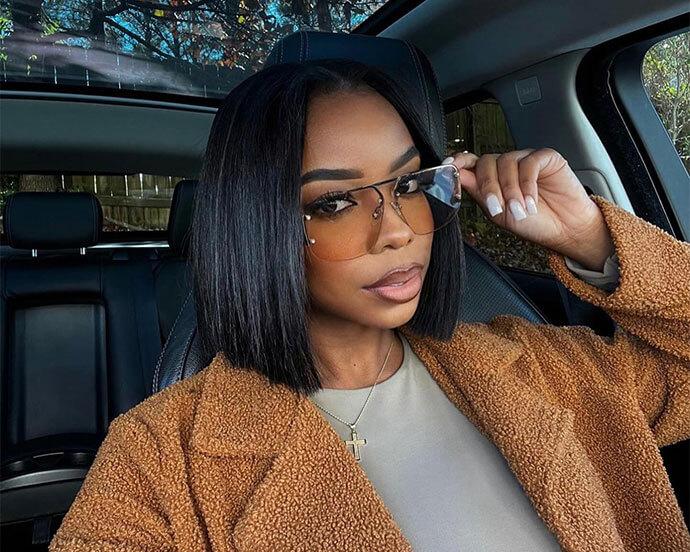
1. Slicked-Back Siren Wavy Wet-Hair Look
With not a hair out of place, this slicked-back wet hair look means business. A deep side part gives it that editorial drama, while the sleekness of the look perfectly encapsulates that intimidatingly beautiful vibe. Plus, this styling keeps your face free for a matching siren glam.
2. High-Shine Finger Waves
Give your slick siren look a retro feel by adding in some finger waves. Straighten out your strands after applying your product—you may have to use some extra gel in this case—and then use your fingers to create waves, clipping your hair into place to secure the look. Set your look by diffusing it and adding some hairspray, keeping any flyaways at bay.
3. Drenched Bangs
For an ultra-drenched look, spotlight your bangs instead of slicking them back. After wetting your hair, apply a mixture of gel and cream and style your hair how you would usually, even scrunching some curls in for a bit of texture. Style your bangs last, using your fingers to create any curls before laying them down on your forehead. The result? A lived-in look that still packs the drama.
4. Subtle Waves
Dip your toe into the wet hair trend with a subtle wavy look. After dispersing your product into hair, scrunch up your hair into casual curls before clipping them in. Once the look dries down, you can loosen up the curls with your hands, spritzing your locks with some water for a more bohemian look. That way, you’ll look less drenched and more like you just stepped out of the shower. This option is great for those with short hair, since it adds a bit of texture without requiring a ton of styling.
5. Glittery Mermaid Locks
Want to tap into the mermaid magic of the wet hair look? Add some chunky glitter into the mix. Before styling your slicked-back hair, work a glitter of your choice into your product, then apply as you would depending on your hair texture. You’ll end up with a standout look that shines from every angle.
Liked this post? Share!
Related Stories


Hair
Grab Your Boots and Your Hat—Cowboy Copper Is Bringing Country Back
Published on Jul 10, 2025 • 7 min read


Hair
Did You Just Get a Bad Haircut? Here’s How the Experts Recommend Dealing With It
Published on Jul 10, 2025 • 8 min read


Hair
10 Popular Haircut Ideas If You’re Itching To Change Things Up
Published on Jun 20, 2025 • 11 min read


Hair
Save These 14 Types of Braids as Inspo for Your Next Salon Appointment
Published on Jun 18, 2025 • 8 min read


Hair
Old Money Blonde: How to Achieve This Season’s It-Girl Hair Trend
Published on Jun 18, 2025 • 4 min read
Hair
10 Hairstyles for Straight Hair That Are Anything But Basic
Published on Jun 5, 2025 • 6 min read


Hair
8 Best Hair Wax Sticks to Help You Say Goodbye to Flyaways
Published on Jun 3, 2025 • 5 min read


Hair
Yes, You Can Revive Your Heat-Damaged Curls: Here’s How
Published on May 24, 2025 • 3 min read


Beauty Picked Just for You
Get 5 products worth up to $70
Plus exclusive access to epic deals up to 80% off
Starting at just $14/month. Cancel anytime.